Difference between revisions of "Waterproofing your Foot Pads"
| (10 intermediate revisions by the same user not shown) | |||
| Line 1: | Line 1: | ||
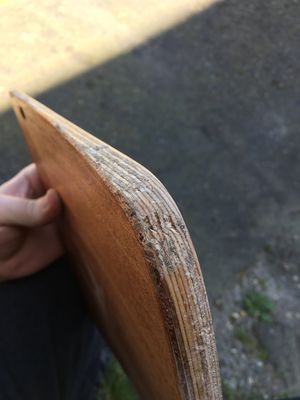
⚠️ WARNING: MAY VOID YOUR WARRANTY. | [[File:Waterproofing pad 0.jpg|thumb|Example of a damaged footpad which is no longer resistant to water damage.]] | ||
⚠️ WARNING: MAY VOID YOUR [[Warranty|WARRANTY]]. | |||
The [[Onewheel+]] comes from the factory with a coat of Oil-Based Polyurethane. This is what makes your foot pads resistant to water. This coating | The [[Onewheel+]] comes from the factory with a coat of Oil-Based Polyurethane. This is what makes your foot pads resistant to water. This coating however will wear off over time and after an impact. Once the varnish is removed and bare wood fibers are exposed, the footpads are no longer protected against mold and mildew which could make the wood swell or even rot. | ||
== | __TOC__ | ||
In this tutorial we will cover how to do a "touch up" to maintain the water resistance of your foot pads by reapplying some polyurethane or spar urethane onto the footpads. | |||
== Maintaining the original look of the footpads == | |||
In this tutorial we will cover how to do a "touch up" to maintain the water resistance of your foot pads by reapplying some polyurethane or spar urethane onto the [[footpads]]. It is important the Urethane or Polyurethane you are using is Oil based. | |||
Clear epoxy could also maintain the original look however its application is a lot more complex. | |||
=== Supplies === | === Supplies === | ||
| Line 12: | Line 17: | ||
** 240-800 grit for finishing | ** 240-800 grit for finishing | ||
* (Optional) Carpenter's Wood Filler, stainable if possible | * (Optional) Carpenter's Wood Filler, stainable if possible | ||
* Mineral spirits or paint thinner (for cleaning) | * Mineral spirits or paint thinner (for cleaning the brushes) | ||
* Paint brushes | * Paint brushes | ||
=== Instructions === | === Instructions === | ||
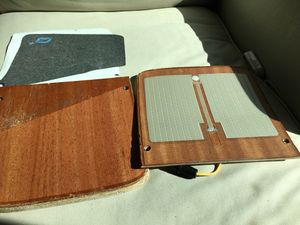
1. Remove the grip tape (see [[Grip tape replacement]] for instructions) from the footpad(s). | 1. (Optional) Remove the grip tape (see [[Grip tape replacement]] for instructions) from the footpad(s). For a simple "touch up", you could leave the grip tape in place. | ||
[[File:Naked Footpads.jpg|none|thumb]]2. Sand down the imperfections to obtain a smooth surface (start with the lower grit). | [[File:Naked Footpads.jpg|none|thumb]]2. Sand down the imperfections to obtain a smooth surface (start with the lower grit). | ||
[[File:Waterproofing pad 4.jpg|none|thumb]] | [[File:Waterproofing pad 4.jpg|none|thumb]] | ||
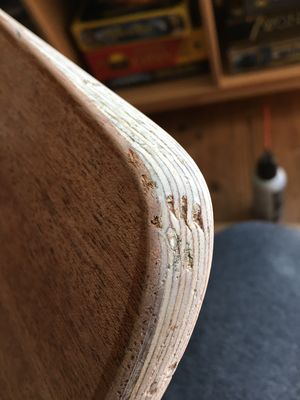
3. (Optional) Fill the holes in the wood with some Carpenter's Wood Filler according to the instructions. Let dry then sand to the appropriate shape. | 3. (Optional) Fill the holes in the wood with some Carpenter's Wood Filler according to the instructions. Let dry then sand to the appropriate shape.<gallery> | ||
File:Waterproofing pad 7.jpg| | |||
File:Waterproofing pad 6.jpg| | |||
[[File:Waterproofing pad | </gallery>4. Sand down the entire area where you'll apply the varnish (to ensure the coating "sticks").<gallery> | ||
File:Waterproofing pad 8.jpg| | |||
File:Waterproofing pad 9.jpg| | |||
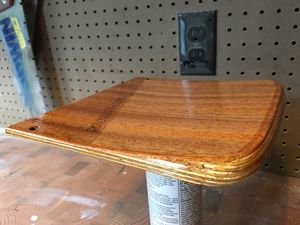
</gallery>5. Apply the polyurethane or (spar) urethane following the manufacturer's instructions.<gallery> | |||
File:Waterproofing pad 10.jpg| | |||
File:Waterproofing pad 11.jpg| | |||
File:Waterproofing pad 12.jpg| | |||
</gallery>6. Re-apply as many layers as desired, making sure the layers are completely dry before applying a new coat. If a coat has been drying for over 12 hours, lightly sand before re-coating:<gallery> | |||
File:Waterproofing pad 13.jpg| | |||
File:Waterproofing pad 14.jpg| | |||
</gallery>7. You're done! Wait for the varnish to thoroughly dry (24-72 hrs) prior to use. If you removed the grip tape in step one, now you can install a fresh set! Make sure your brushes are clean and dry! | |||
[[File:Waterproofing pad 15.jpg|none|thumb]] | |||
[[Category:Mods]] | [[Category:Mods]] | ||
[[Category:Mods]] | [[Category:Mods]] | ||
Latest revision as of 20:56, 21 September 2017
⚠️ WARNING: MAY VOID YOUR WARRANTY.
The Onewheel+ comes from the factory with a coat of Oil-Based Polyurethane. This is what makes your foot pads resistant to water. This coating however will wear off over time and after an impact. Once the varnish is removed and bare wood fibers are exposed, the footpads are no longer protected against mold and mildew which could make the wood swell or even rot.
Maintaining the original look of the footpads
In this tutorial we will cover how to do a "touch up" to maintain the water resistance of your foot pads by reapplying some polyurethane or spar urethane onto the footpads. It is important the Urethane or Polyurethane you are using is Oil based.
Clear epoxy could also maintain the original look however its application is a lot more complex.
Supplies
- Oil-based Polyurethane or Spar Urethane
- Sandpaper in different grits:
- 100-180 grit to smooth out cracks and dents
- 240-800 grit for finishing
- (Optional) Carpenter's Wood Filler, stainable if possible
- Mineral spirits or paint thinner (for cleaning the brushes)
- Paint brushes
Instructions
1. (Optional) Remove the grip tape (see Grip tape replacement for instructions) from the footpad(s). For a simple "touch up", you could leave the grip tape in place.
2. Sand down the imperfections to obtain a smooth surface (start with the lower grit).
3. (Optional) Fill the holes in the wood with some Carpenter's Wood Filler according to the instructions. Let dry then sand to the appropriate shape.
4. Sand down the entire area where you'll apply the varnish (to ensure the coating "sticks").
5. Apply the polyurethane or (spar) urethane following the manufacturer's instructions.
6. Re-apply as many layers as desired, making sure the layers are completely dry before applying a new coat. If a coat has been drying for over 12 hours, lightly sand before re-coating:
7. You're done! Wait for the varnish to thoroughly dry (24-72 hrs) prior to use. If you removed the grip tape in step one, now you can install a fresh set! Make sure your brushes are clean and dry!


